Dry-fire training with a laser in pointMoA — a step-by-step guide
How to dry-fire with a laser cartridge and the pointMoA app: which laser, how to print the target and place the phone, calibration, the background test, strings, drills and pre-zeroing. With safety rules and what happens to the camera image.
Dry fire is practising the trigger, aiming and gun handling without live ammunition. Plain dry fire lacks one thing: knowing where the bullet would have gone. A laser cartridge supplies it — it flashes every time the firing pin strikes — and the pointMoA app catches that dot with the phone camera on a printed target, marks the hit in millimetres from the point of aim and measures the group. All of it happens on the phone, with no Internet connection.
This article is a user guide: from choosing the laser, through printing the target and placing the phone, to a saved session. Screen and button names are given exactly as they appear in the English version of the app (version 2.457, Android). A shorter version of this guide lives in the app itself: in Quick targets, in “Dry fire” mode, under the “How it works” panel.
What you need
- A phone with the pointMoA app and a tripod or another solid stand. The phone must not move during a string.
- A laser cartridge in your firearm's calibre. Red, with a wavelength of about 630–670 nm, up to 5 mW (class IIIa), giving a short flash when the firing pin strikes. Details below, because the type of laser decides what you can train.
- A target printed from the app — with a grey field and four markers in the corners, at 100% scale on A4, A3 or A2. An ordinary paper target will not do: the app calibrates the frame from the markers and looks for the dot on the grey field.
- An unloaded firearm and a safe backstop — more on that next.
The app is not tied to any laser brand and does not recommend one.
Safety first
A laser cartridge in the chamber does not turn a firearm into a toy. The app will not start the camera until you confirm four rules with the “Confirm and turn the camera on” button:
- Firearm unloaded, magazine removed, chamber checked by eye and by finger.
- Only the laser cartridge in the chamber. No live ammunition in the room.
- Muzzle pointed at the target against a safe backstop — never at a window or towards people.
- The phone on its stand sees the whole sheet; do not cover the lens.
Then the laser itself: class IIIa can damage eyesight. Do not look into the beam, and even with a laser cartridge never aim at people or animals.
Which laser — a flash or constant light
The camera looks for a red dot. A phone camera cannot see infrared (e.g. 850 nm), and the app does not count a green dot. The second question is whether the laser flashes or stays on.
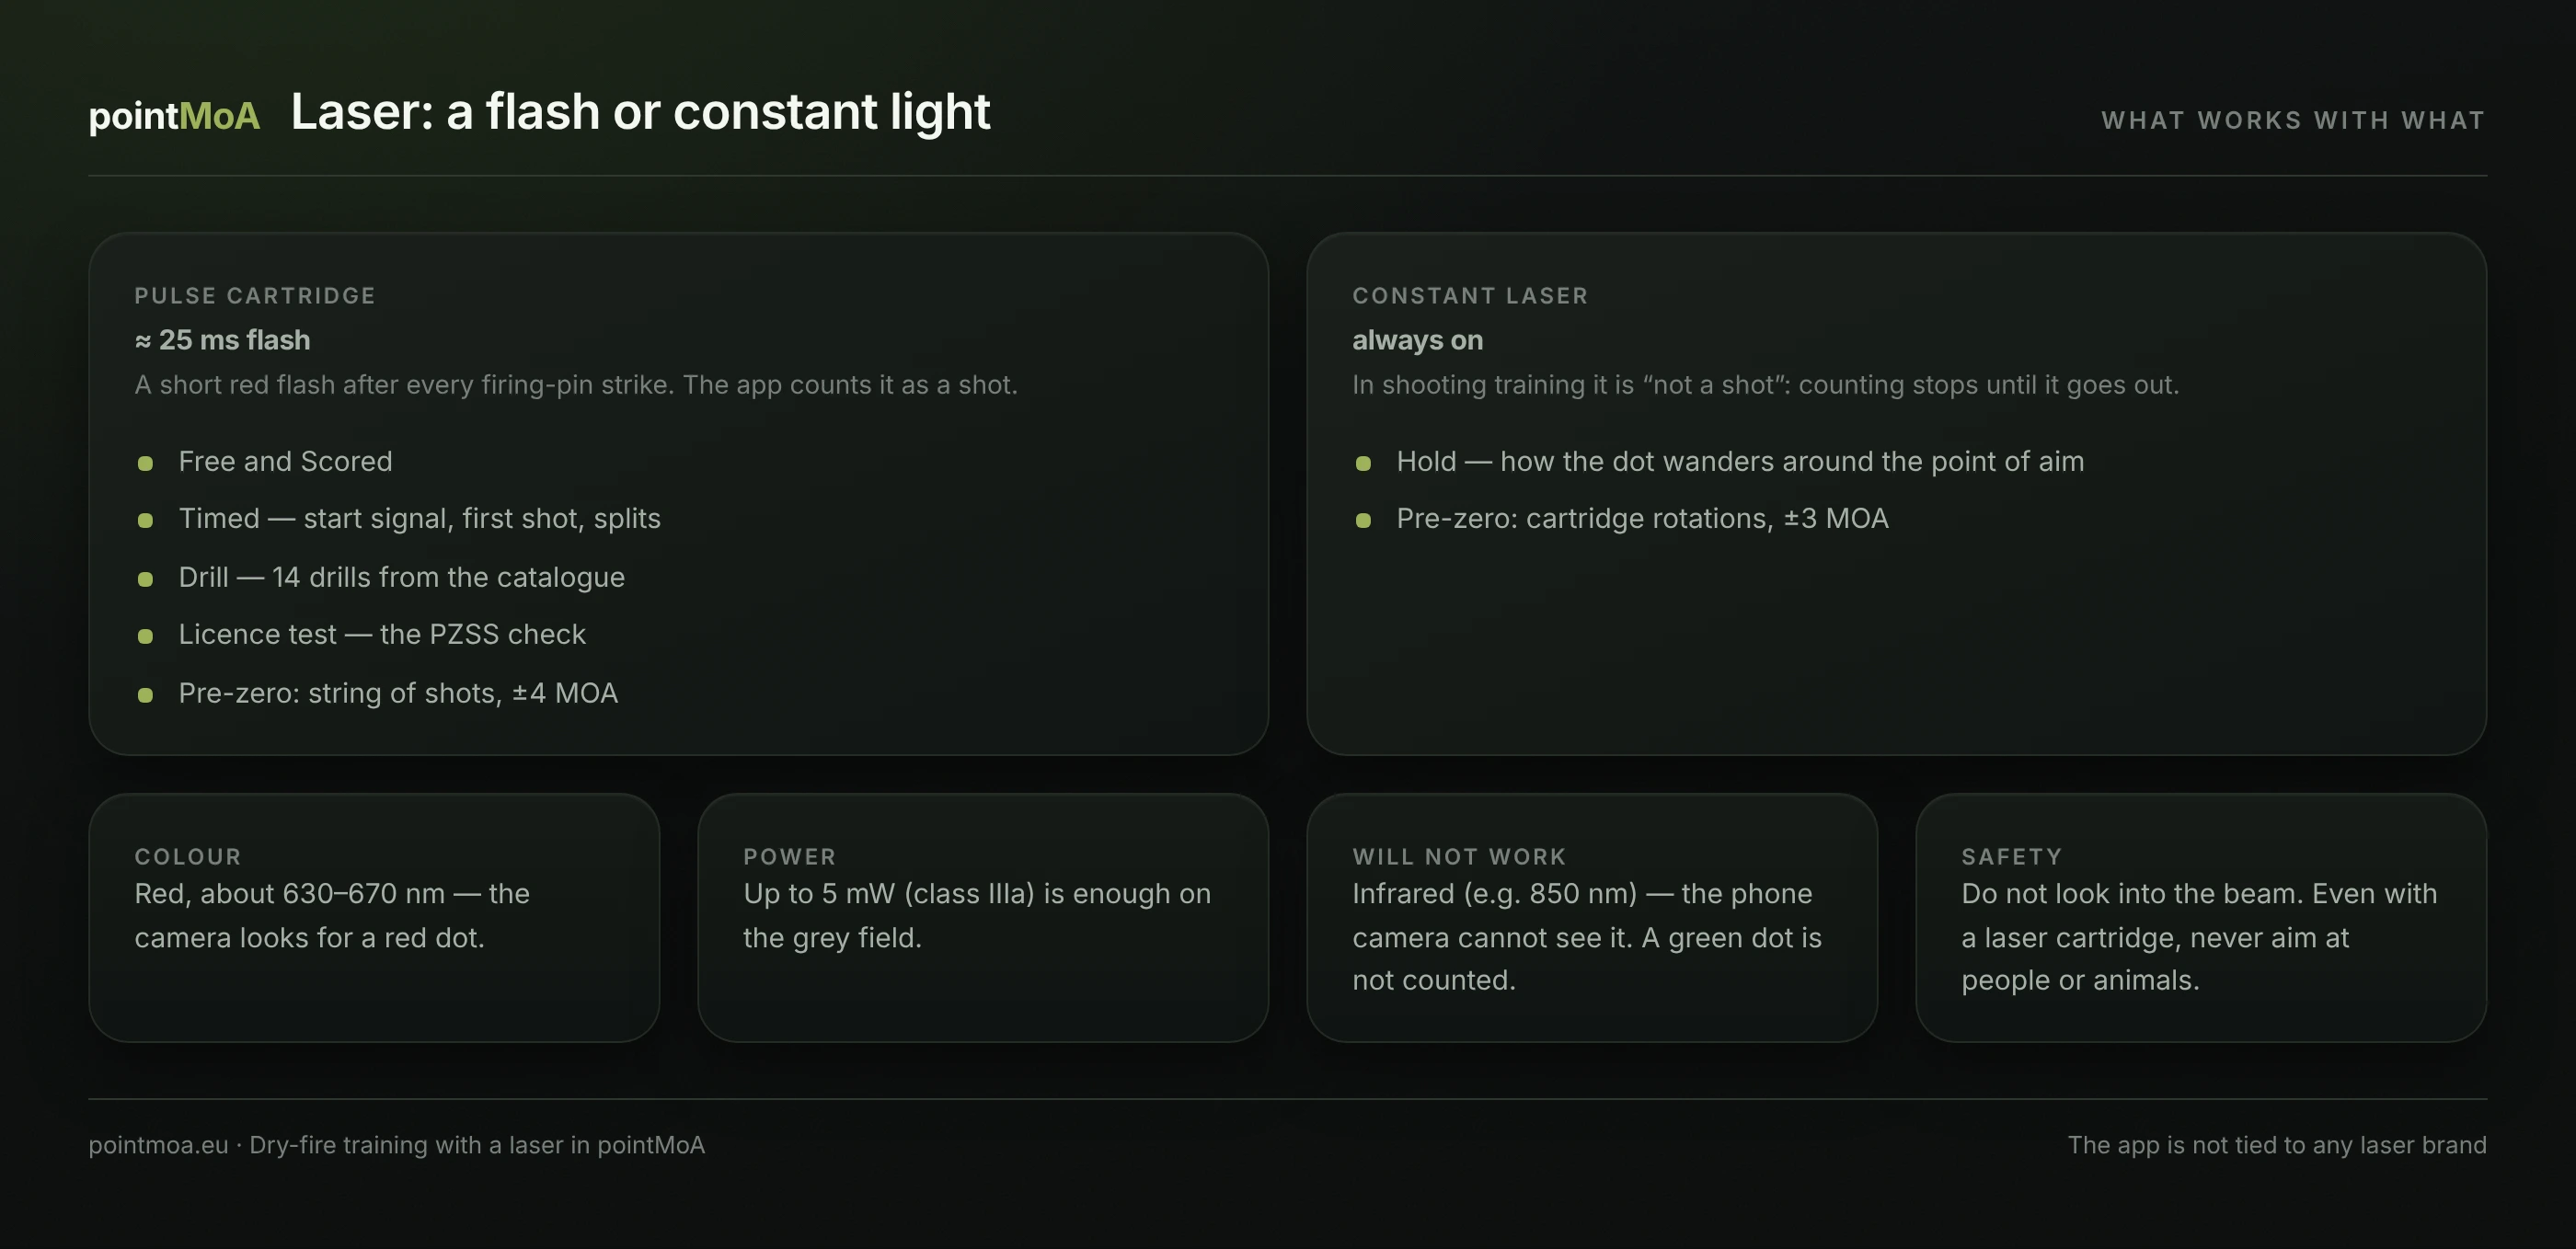
- A pulse cartridge gives a short flash — about 25 ms — after every firing-pin strike. It covers the shooting: free and scored strings, timed shooting, drills, the licence test and pre-zeroing with a string of shots.
- A constant laser (a cartridge with steady light or a bore-sighting laser) is “not a shot” to the app in shooting training: the screen shows “Continuous light detected” and counting pauses until it goes off. It is useful in “Hold” training and in pre-zeroing by “Cartridge rotations”.
One thing surprises people on the first shot: a laser cartridge does not cycle the gun. With no recoil the slide does not move, so nothing recocks the striker or the hammer. A striker-fired pistol needs racking after every shot, a single-action hammer needs cocking, and a bolt or manual repeater needs its action worked. Only DA/SA (follow-up shots in double action, with a heavier pull), DAO, double-action revolvers and guns with an external reset fire shot after shot. It pays to set “Trigger mechanism” on the firearm card in the Armory: for a multi-shot timed drill the form warns you when the gun needs recocking after every shot. And a note on racking: a rimless laser cartridge stays in the chamber, because the extractor has nothing to grab.
Where to find it in the app
Dry fire is not a separate module in the menu. A session starts in one of two ways:
- Logbook → “Dry fire” tab → “New dry-fire session” — this is also where all saved sessions live;
- Home screen → the “Live fire / Dry fire” switch → “New dry-fire training”.
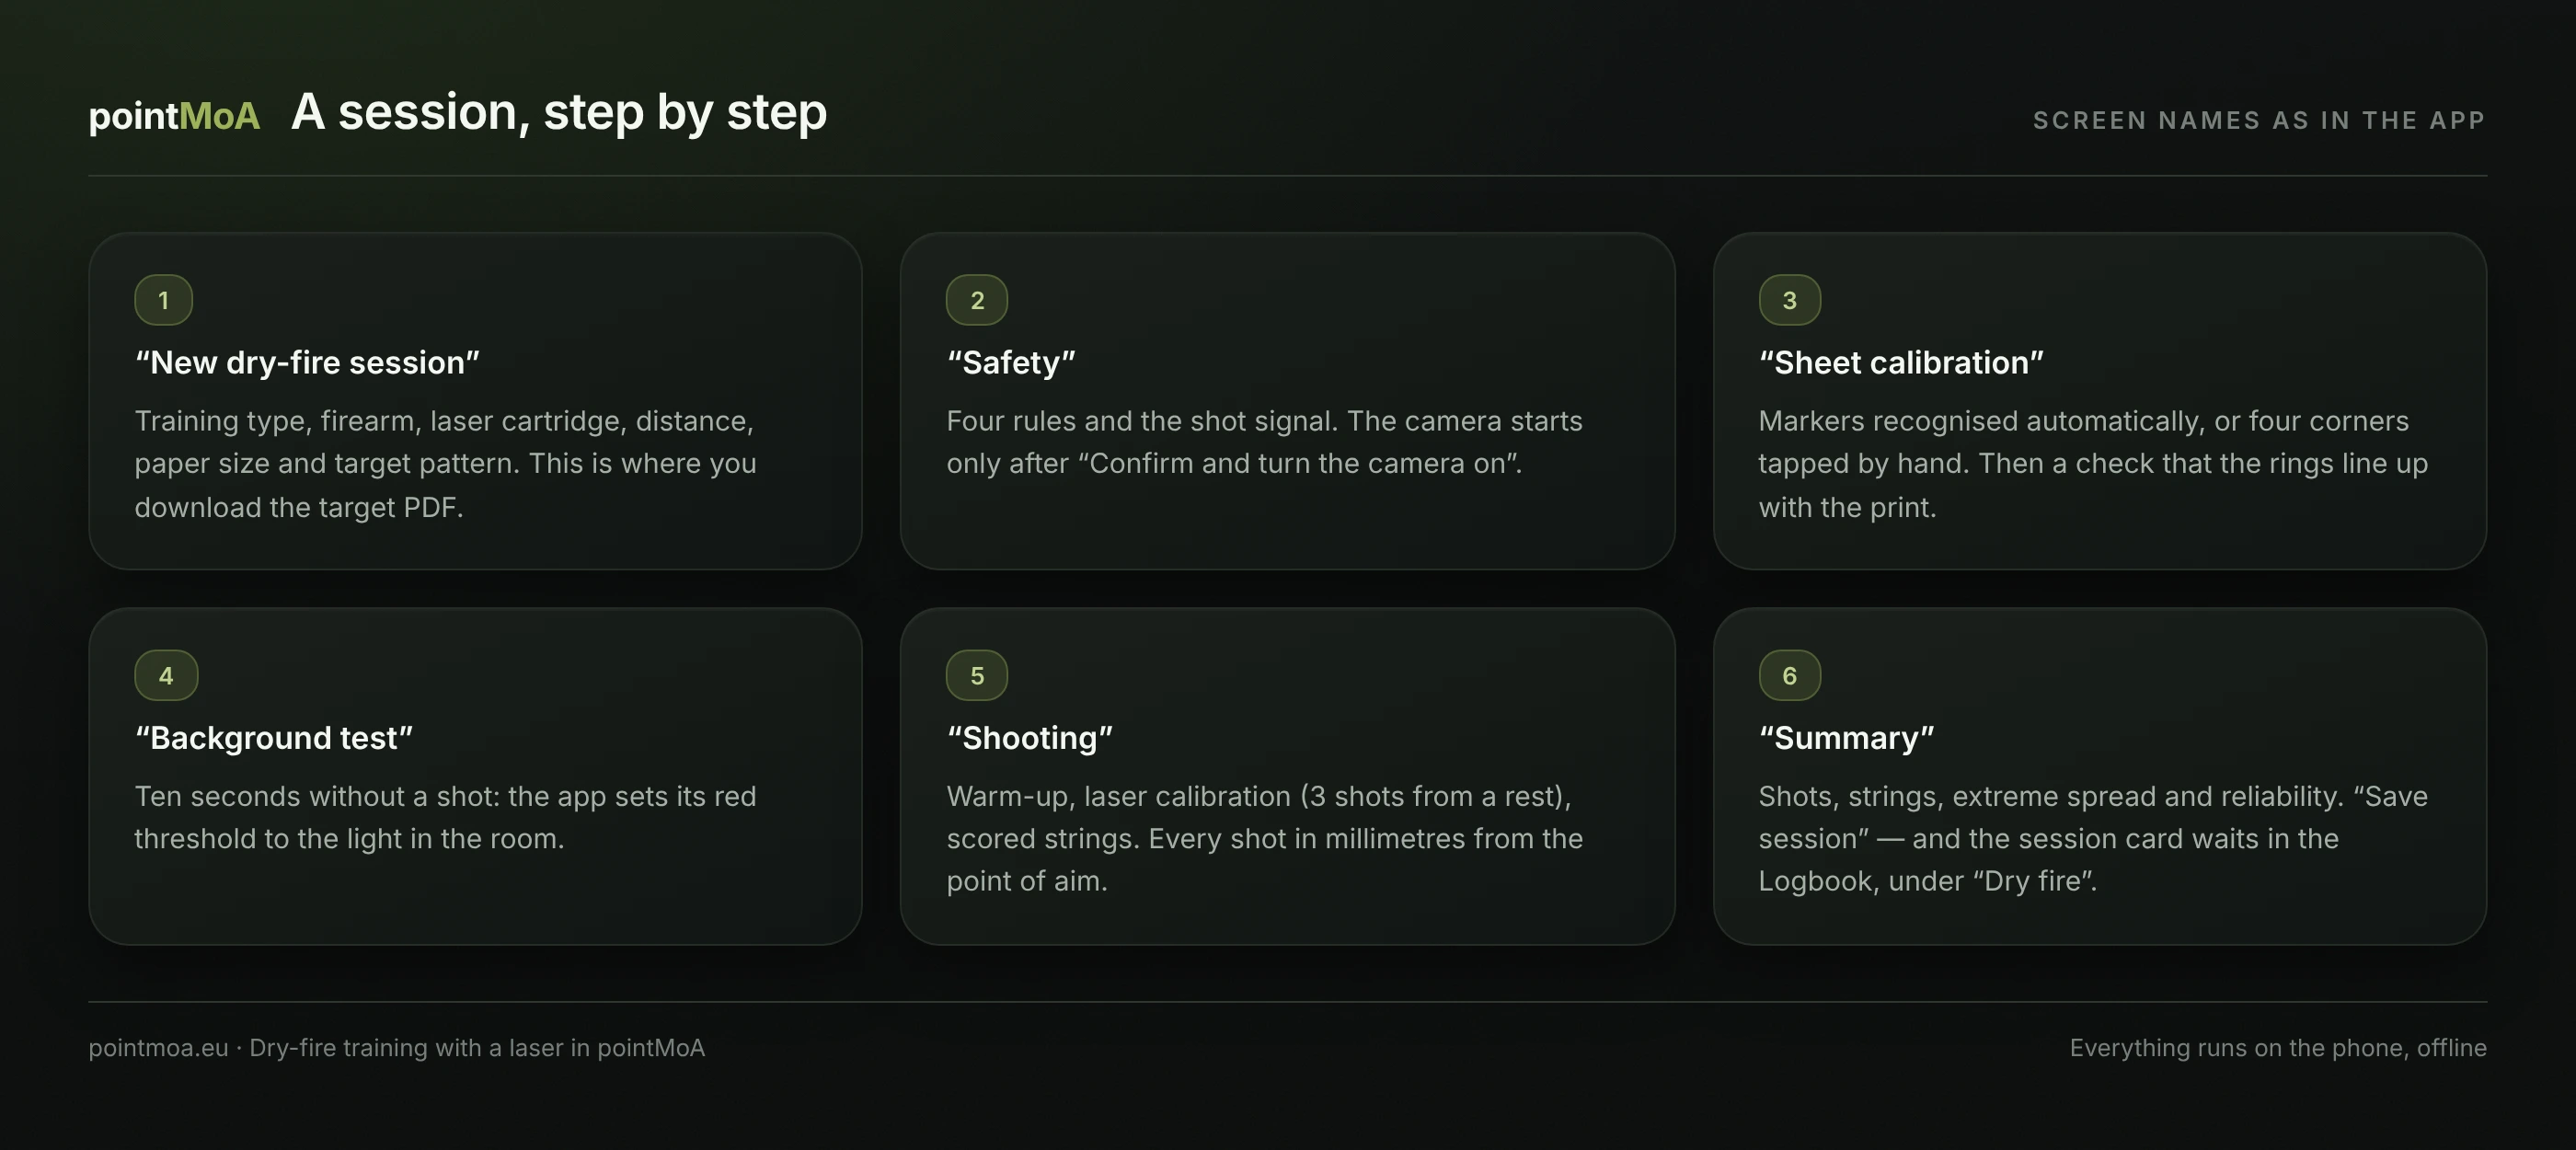
A session is six screens of the app. Between the first and the second comes one step away from the phone: setting up the station.
Step 1: the form and the printed target
On the “New dry-fire session” screen you choose the training type, firearm, laser cartridge, distance, paper size (A4, A3 or A2) and target pattern. The distance runs from the muzzle to the sheet — from 0.5 to 100 m.
There are more than a dozen patterns, including the default “Scoring circle”, “Aiming ring”, ISSF 10 m targets at 1:1, the NT-23P figure, a bust with rings, IPSC, USPSA and IDPA silhouettes, Dot Torture and VTAC drill sheets and the pointMoA training target 20/12/6 cm. “Download the printable target (PDF)” gives you the file in the chosen size.
Print at 100% scale and measure the 100 mm segment on the sheet with a ruler. The app does not check the print scale, and a sheet shrunk by the printer's “fit to page” shifts every number in the result. Fix the sheet flat, upright, long side up — on a wall or a board.
Step 2: place the phone
The most common mistake: the phone next to the shooter. The phone stands by the target — 1–1.5 m from the sheet, slightly to the side, out of the line of fire. This is not the shooting distance; you enter that in the form.
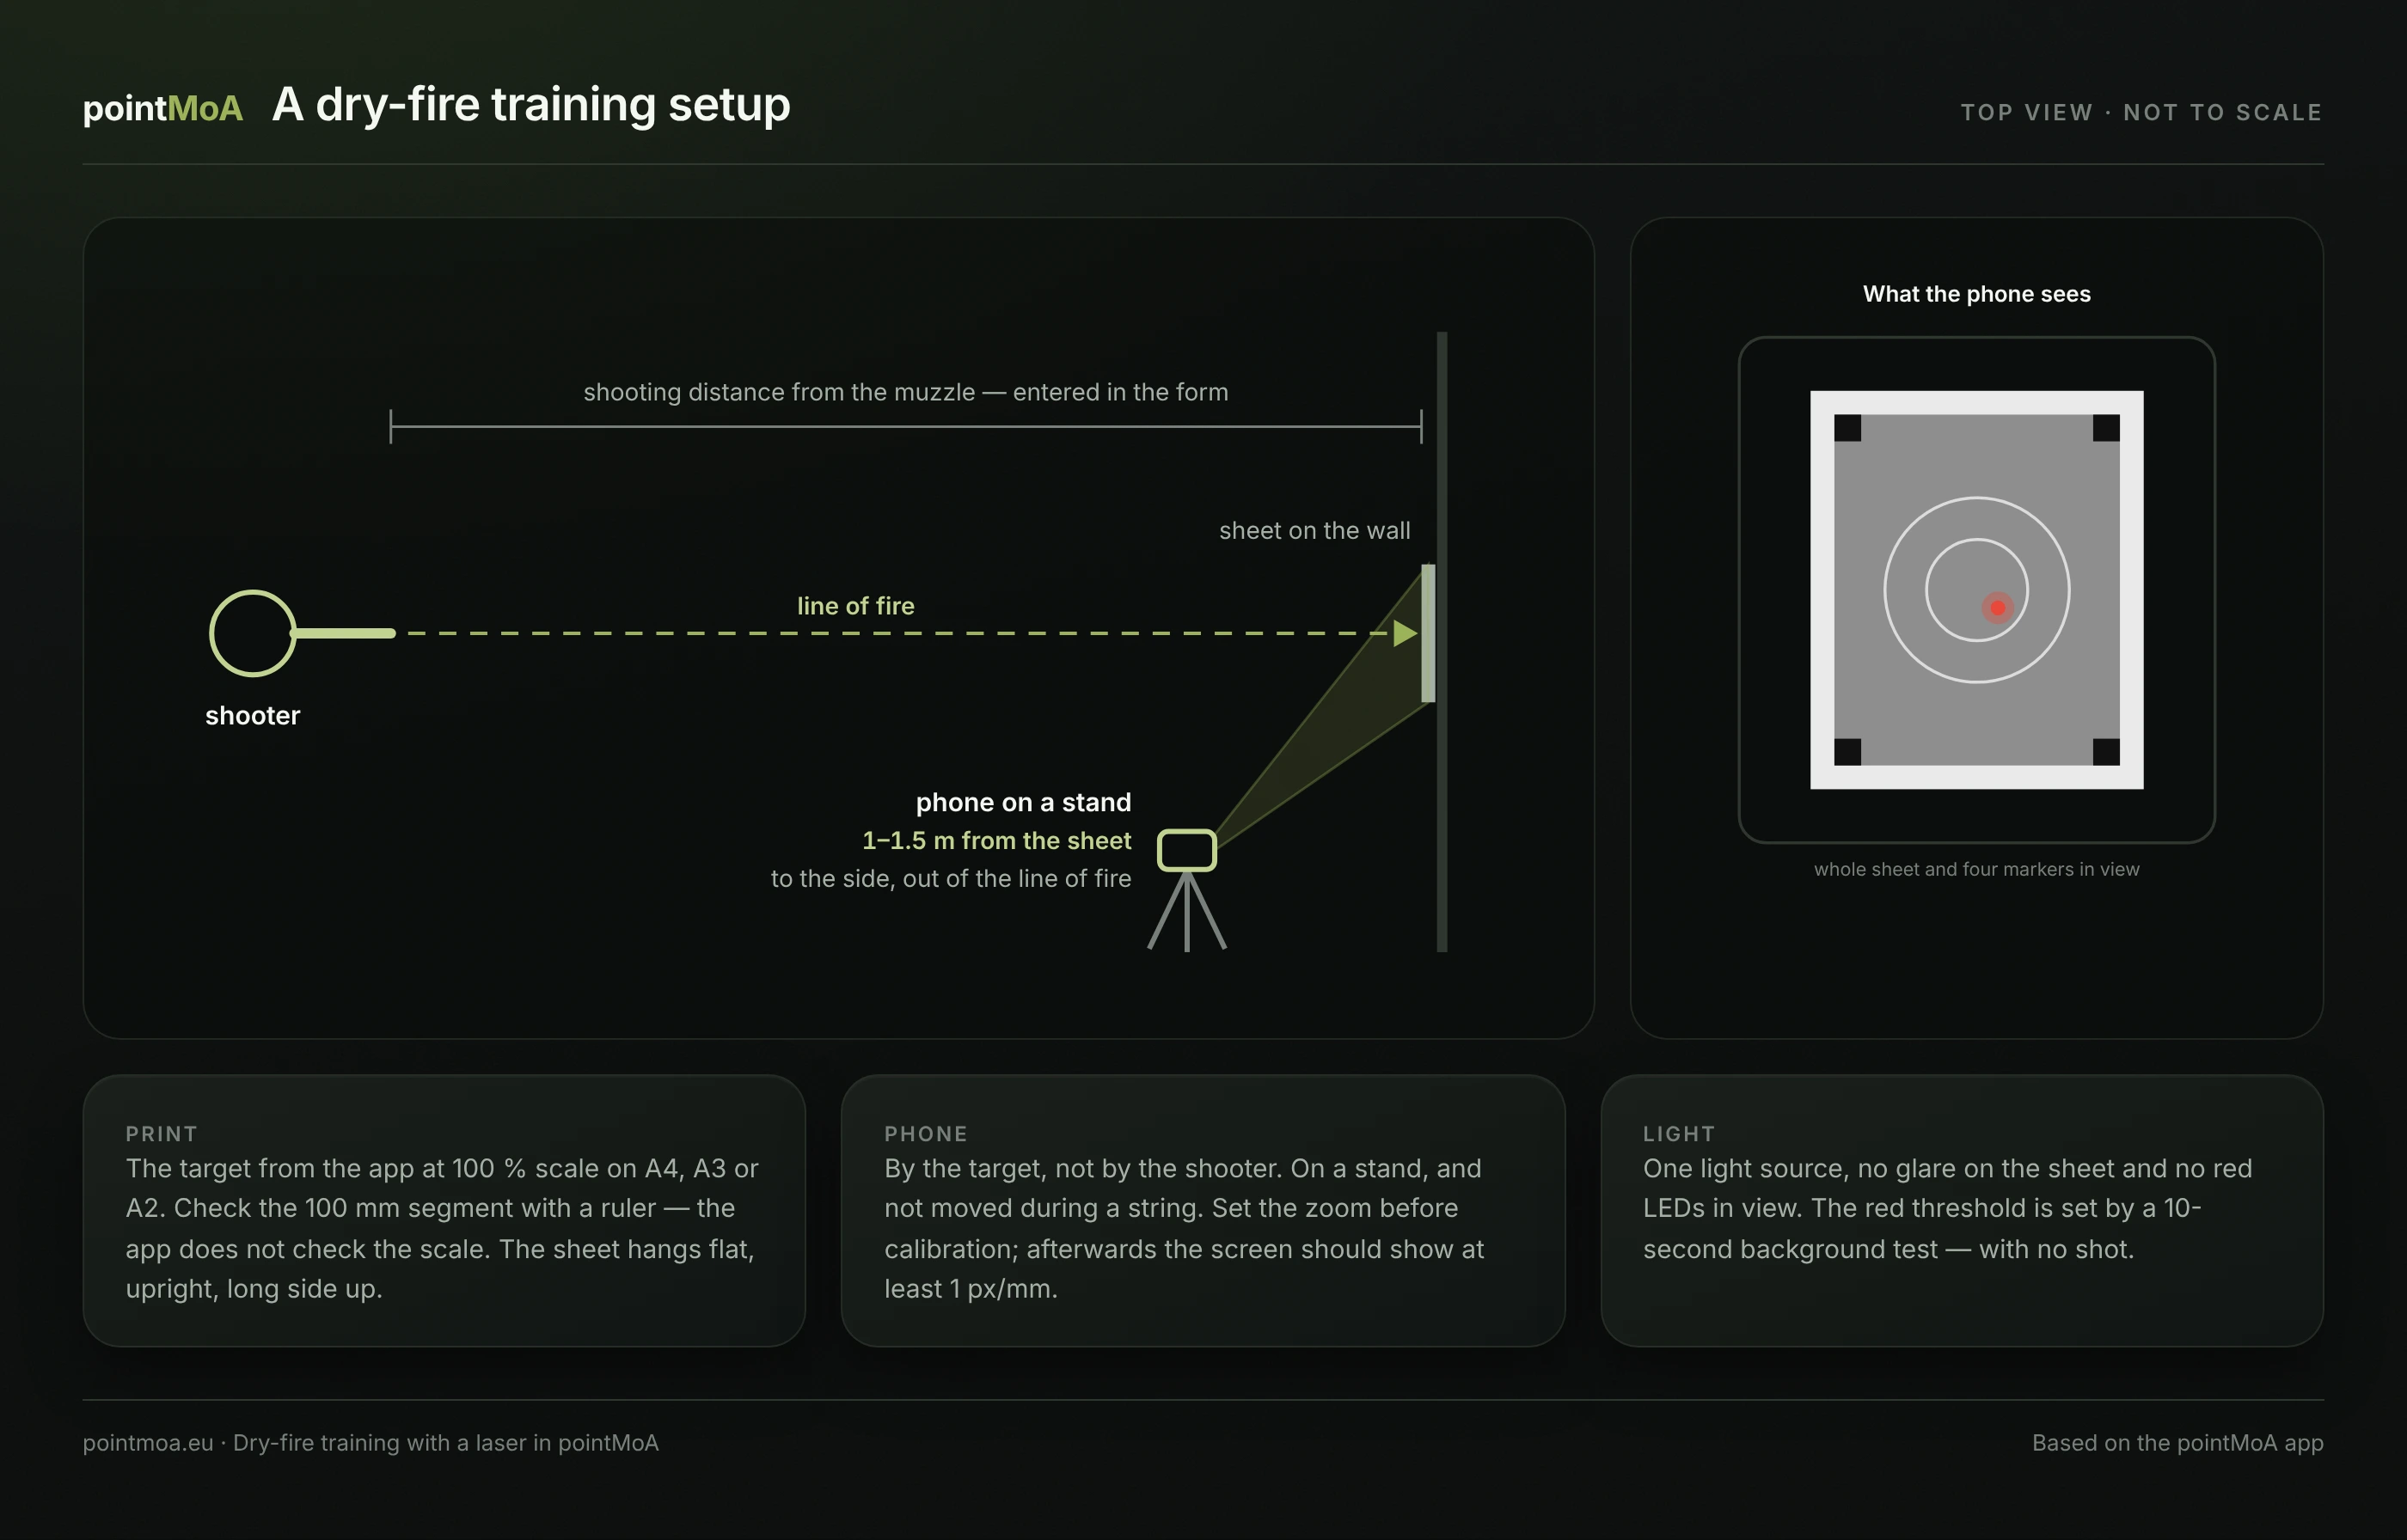
- A tripod, ideally with a phone holder. Do not hold the phone in your hand or move it during a string.
- The whole sheet and all four markers in the frame, with the sheet filling a large part of the image. After calibration the screen shows “Sheet in frame: … px/mm” — you need at least 1 px/mm. Too few? Move the phone closer, use 2× zoom (if the phone has it — before calibration) or a larger paper size.
- One light source, no glare on the sheet and no red LEDs in the frame — every red patch is a candidate shot.
Step 3: safety and the shot signal
The “Safety” screen shows the four rules from the beginning of this article. It is also where you pick the “Shot signal”: “Bang and voice” or “Beep and vibration” (the default). The phone watches the target, so you hear the shot confirmation rather than see it. Only “Confirm and turn the camera on” starts the preview.
Step 4: sheet calibration
On a target from the app calibration happens by itself: the app looks for the four markers and, once it finds them, says “Markers recognised — calibration ready.” From then on it measures millimetres from the sheet's point of aim.
When it cannot see the markers, it tells you why — most often a shadow, lamp glare on a marker, a corner of the sheet out of the frame, a moved phone or a sheet too far away. The manual route is always there: tap the four corners of the sheet on the preview clockwise (holding your finger opens a magnifier) and confirm with “Confirm calibration”.
Then the app lays the pattern's green rings over the image and asks you to “Check that the rings line up with the print.” If they drift apart, the sheet is not flat or the printed size does not match the chosen one — fix that and recalibrate before the first shot.
Two things are set before calibration, not after it: the zoom (changing the frame invalidates the sheet geometry) and the camera — “Switch camera” only helps when the image is clearly wider than in the camera app. The main camera gives the most pixels per millimetre of the sheet.
Step 5: the background test
Ten seconds without a shot. The app watches the sheet and sets its red threshold to the light in the room — otherwise a red reflection from a lamp could pose as a shot. Switch a constant laser off for the test: its dot would end up in the background mask and vanish from detection.
The test can be skipped, but then the session will not be marked “Reliable”. That mark needs a passed background test, not a single background event during the session and at most one recalibration.
Step 6: shooting
The “Shooting” screen has three kinds of strings:
- “Warm-up” — counted outside the score;
- “Laser calibration (3 shots from a rest)” — the laser sits in the bore axis and the optic above it, so without a correction the dot lands below the line of sight by the sight height. Three shots from a rest set the correction the app applies to the following shots;
- “Scored string” — the actual training, closed with “End string”.
Every shot appears on the target drawing with its time and its position in millimetres from the point of aim. The “Target / Camera” switch changes the view — the target view deliberately does not show the camera image. If the phone moves, “Recalibrate” sets the geometry again; “Finish training” takes you to the summary.
Step 7: summary and saving
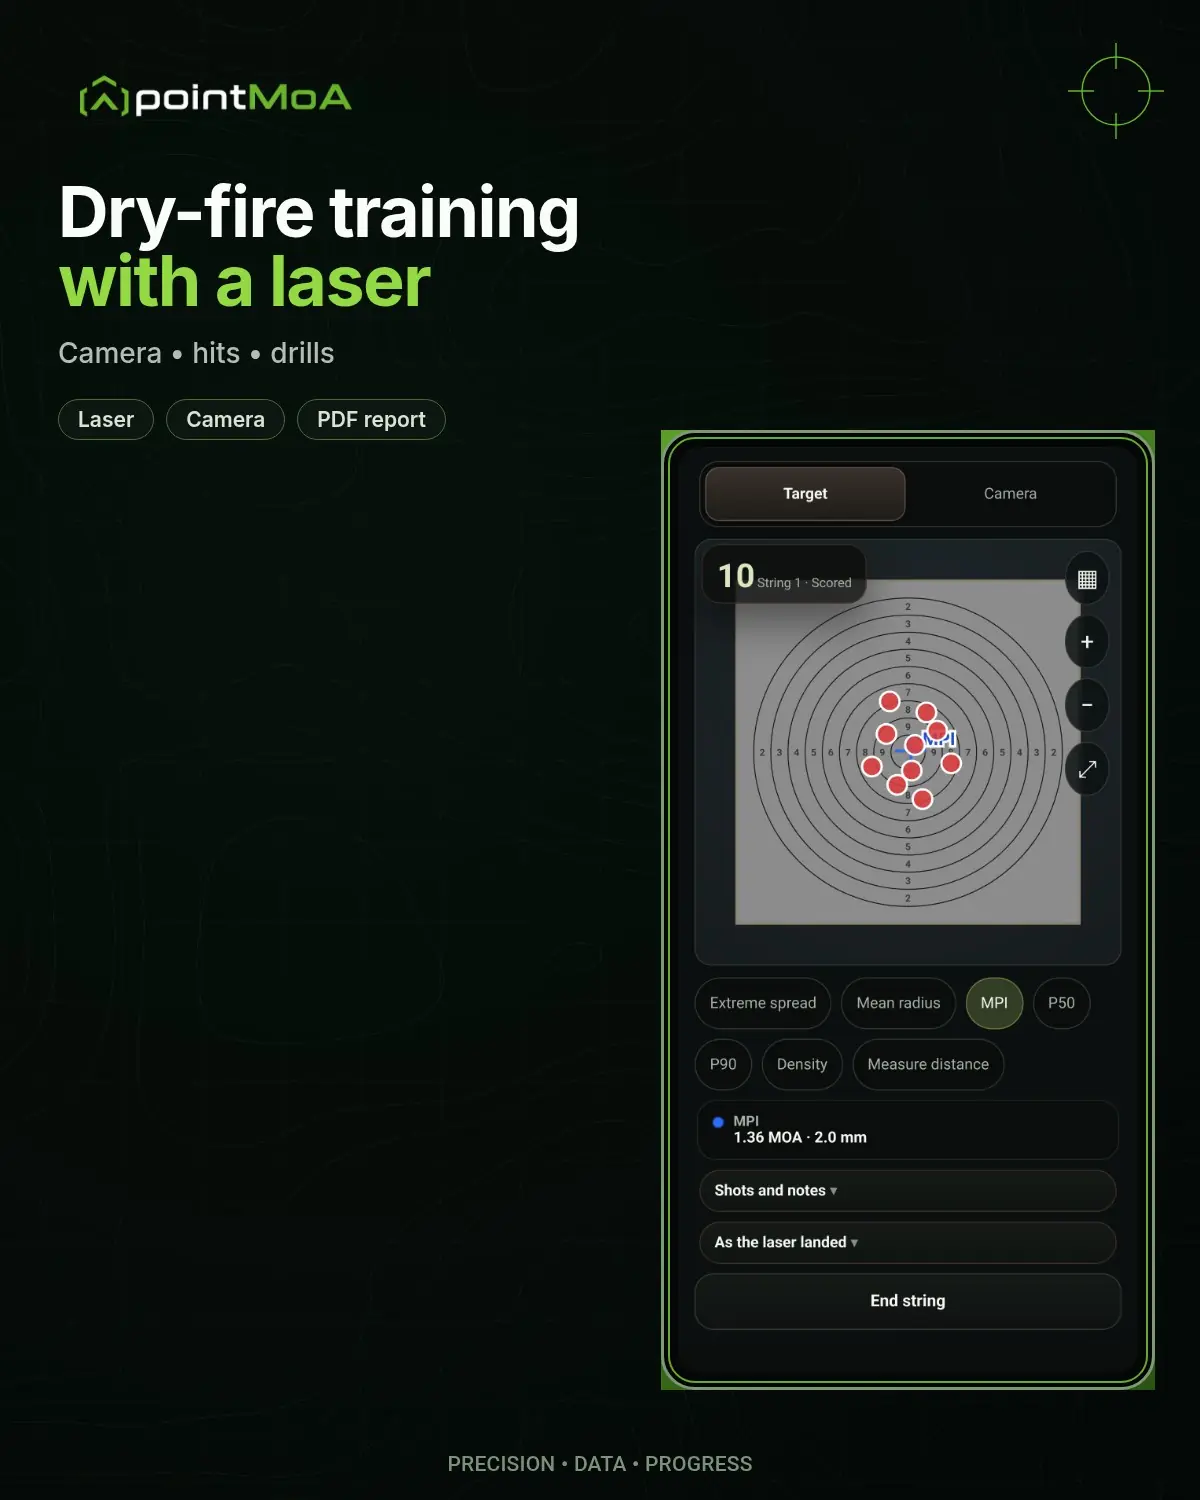
The “Summary” gathers counted shots, strings, extreme spread and reliability. You add a note (lighting, stance, takeaways), and “Save session” opens the session card with its “Session / Targets / Statistics” tabs and a PDF report.
Laser results do not mix with live fire: they never enter session or match statistics, the firearm round count or ammunition stock. They have their own Logbook tab, their own goals and records, and the overall statistics live in Progress, in the “Dry fire” view: overview, analysis, goals, records and insights.
What you can train
The training type is chosen in the form:
- Free — every shot on the target, the group in angle and in length, no points and no time.
- Scored — points from the rings of the printed pattern. With a firearm profile the app also computes a “real” score: the aiming error carried along the bullet's trajectory to the nominal distance (without recoil or time of flight).
- Timed — a start signal after a random delay, first-shot time, splits and par time. Times come from video frames, accurate to ±33 ms.
- Drill — fourteen drills from the catalogue, each with its zone, number of shots, nominal distance and par time: among them the Bill Drill, FAST, Dot Torture, IDPA 5×5, VTAC 1–5, El Presidente and the 1R1 and 2R2 reload drills. Scored by the drill's own rule — with penalties and hit factor where the drill uses them.
- Licence test — the Polish PZSS check: five shots into the regulation circle scaled down to your home distance.
- Hold — with a constant laser: several segments of holding the dot on the point, each in a chosen position (standing, kneeling, prone or supported). The result is the RMS radius, ellipses, drift and time in the zone.
- Pre-zero — its own section below.
Pre-zeroing with a laser
A pre-zero sets the sights so that the first shot at the range lands on the sheet. It does not replace zeroing with live ammunition — the app says so plainly, and nothing from the pre-zero goes into the Zeroing module.
You need a firearm with a Calculator profile assigned: that is where the sight height, zero distance, click value and turret directions come from. “Download pre-zero card (PDF)” gives you a sheet with two marks: PC — where the centre of the reticle should look, and PT — where the laser dot from the bore axis should land. The app computes the distance between them from the firearm profile.
There are two methods:
- “String of shots” (the default) — a pulse cartridge, the firearm on a rest, the reticle centre on PC, five shots. The app shows the hits, their mean point of impact and the clicks — just like zeroing with live ammunition. After the correction you fire a check string. Uncertainty: ±4 MOA.
- “Cartridge rotations” — a constant laser, the firearm on a rest. The cartridge is turned in the chamber to 0°, 90°, 180° and 270°, and the centre of the four dots cancels a crooked laser. Then you tap the screen where the reticle points and press “Compute clicks”. Uncertainty: ±3 MOA.
Finally, the “Range card (PDF)” puts the result on paper — to take along to the first live shot. How to finish the zero at the range is covered in the zeroing guide.
When something does not work
- The app cannot see the markers. Check that the dry-fire target from the app is in the frame, whole, and not in shadow. Keep the phone still and give it a moment to focus. If the markers are there but the sheet lies on its side, hang it upright, long side up. Tapping the corners by hand is always available.
- Too few pixels on the sheet. Move the phone closer, print the target on A3 or A2, or shorten the distance.
- The dot is not visible. Too dark, or the background too red: dim the room, change the backing, bring the laser closer or use a stronger one (up to 5 mW).
- Shots go missing or double up. The cartridge dot lasts about 25 ms. When the frame rate drops below 20 per second, the flash can fall between frames — more light in the room helps. When the phone refuses manual exposure, the app warns that detection is uncertain.
- The phone moved. “Recalibrate” — otherwise every following shot shifts by the same error.
To be fair: the app does not count dots it did not see — nobody can count what the camera never recorded. That is why there is the “Reliable” mark, and why the insights in Progress show the frame rate of recorded sessions.
What happens to the camera image
The camera starts only after you confirm the safety rules and stops when you close the training screen. Frames are processed only on the device, in memory: the app crops the printed target area out of them and looks for the laser dot in it. It neither saves nor sends the frames — the session stores numbers: shot positions and times, results and the technical camera and calibration data. Signals and voice commands are only played back by the phone; the microphone is not used. The details are in the privacy policy.
Summary
- A red pulse laser up to 5 mW for shooting and drills. A constant laser only for holding and cartridge rotations.
- The target from the app at 100% scale, checked with a ruler on the 100 mm segment.
- The phone by the target, not by the shooter: 1–1.5 m from the sheet, to the side, on a tripod, the whole sheet in the frame.
- Calibration and the background test before the first shot — they decide whether the result is reliable.
- Results kept apart from live fire: Logbook → “Dry fire” and Progress.
- A pre-zero sets the sights for the first shot; the zero is made with live ammunition.